If your elbow still feels stiff months after a fracture, you may be going through the same despair I went through.
At 4 months post-surgery, my elbow could only bend to 80°. My surgeon told me "this is already pretty good for your case." Another doctor said I might never fully recover. Every day I kept asking myself: is this really it?
After hitting that wall, I scheduled an arthrolysis (surgical release) for 2 months later. But I really didn't want to go through another surgery.
So I started researching how elbow rehabilitation actually works — finding methods, training daily, and measuring my angle every single day. In the end, I went from 80° to 150° — a full recovery. The arthrolysis was cancelled.
This article shares what I learned along the way: why your elbow gets stiff after a fracture, what the recovery timeline looks like, which exercises helped me, and why tracking your data matters more than you think.
Important: I am not a doctor. I'm a fracture recovery patient sharing my own experience. This article is based on personal recovery experience and commonly used rehabilitation principles. All exercises should be performed under the guidance of your physical therapist.
Measure your elbow angle in 5 seconds with your phone camera after every training session — no app, no help needed.
Try it free →Why Does Your Elbow Get Stiff After a Fracture?
A lot of people assume that once the bone heals, the joint should go back to normal. That's not how it works.
Post-fracture elbow stiffness is usually caused by multiple factors working together:
Scar tissue formation. The trauma from the fracture and surgery triggers healing that can produce fibrotic scar tissue around the joint. This tissue is harder and less elastic than normal tissue, and may mechanically limit your joint's range of motion.
Muscle atrophy and contracture. During the period when your arm is immobilized or under-used after surgery, your biceps (responsible for bending) and triceps (responsible for straightening) lose strength rapidly. Worse, prolonged inactivity can cause the muscles and joint capsule to gradually shorten — this is called contracture. The longer it goes on, the harder it is to reverse.
Muscle imbalance. Bending and straightening your elbow depends on the coordinated effort of the biceps and triceps working as an antagonistic pair. After a fracture, one side may become tighter due to pain, swelling, or protective spasm. This imbalance can make the joint feel "locked."
Understanding these causes matters because it means: recovery isn't just about waiting for the bone to heal — it requires active training to break through these limitations.
Recovery Timeline: What to Expect at Each Stage
Recovery speed varies significantly depending on fracture type, surgical method, and individual healing. The following timeline is based on clinical rehabilitation protocols and research literature, and serves only as a general reference.
When to start rehab:
If you had open reduction internal fixation (ORIF — plates and screws), early motion may begin within 1–2 days after surgery in many cases — including finger gripping, wrist movement, and gentle active elbow motion within your pain tolerance. However, this depends on fracture stability and your surgeon's specific protocol. In my case, my surgeon had me start gripping, rotating, bending, and straightening the day after surgery — just with minimal force at first.
If you didn't have surgery and were treated with a cast or splint (external fixation), rehab typically begins 2–4 weeks after immobilization.
Early mobilization is widely considered critical for preventing long-term elbow stiffness. Delayed rehabilitation is one of the key risk factors for persistent stiffness.
Weeks 1–6: Early motion phase
The focus is on restoring range of motion while protecting bone healing. Clinical protocols generally recommend active range of motion (AROM) and active-assisted range of motion (AAROM), while avoiding aggressive passive stretching. Some patients may reach around 110°–115° of flexion by week 3 and approximately 120° by week 6, but recovery speed varies greatly depending on injury severity.
Weeks 6–12: Progressive strengthening phase
Once imaging confirms bone healing (usually around week 6), training intensity can increase with progressive resistance exercises and stretching. For milder fractures with smooth recovery, normal bending and straightening range may return within 1–2 months. Most people with uncomplicated recoveries regain near-normal ROM within 2–3 months.
Months 3–6: Continued improvement
Clinical research indicates that the first 6 months after surgery represent the most significant window for ROM improvement — and the most critical period for rehabilitation. If flexion remains significantly limited (for example, below approximately 90°) after 3 months, this may indicate a more challenging recovery, and further evaluation by a specialist is recommended.
Months 6–12: Late-stage recovery
Progress slows down but continues. Many people reach their final recovery outcome during this period. After 12 months, additional improvement tends to be limited.
Key point: Your physical therapist will provide personalized guidance based on your specific fracture type and surgical approach. The timeline above is a general reference from clinical literature and does not represent every individual's actual recovery trajectory.
6 Methods That Helped Me Recover
The following methods are commonly used in rehabilitation practice, but the appropriate timing and intensity depend on your individual situation. Always consult your physical therapist before starting any of these.
1. Pre-training: Resistance band activation (my personal warm-up method)
Note: This is a technique I developed on my own through trial and error — it is not a standard PT protocol. Please check with your physical therapist before trying it.
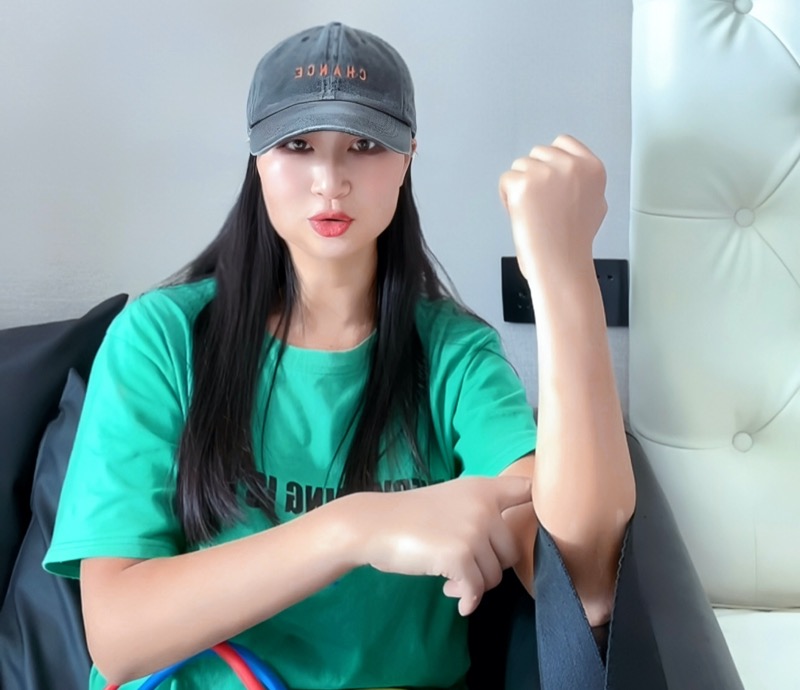
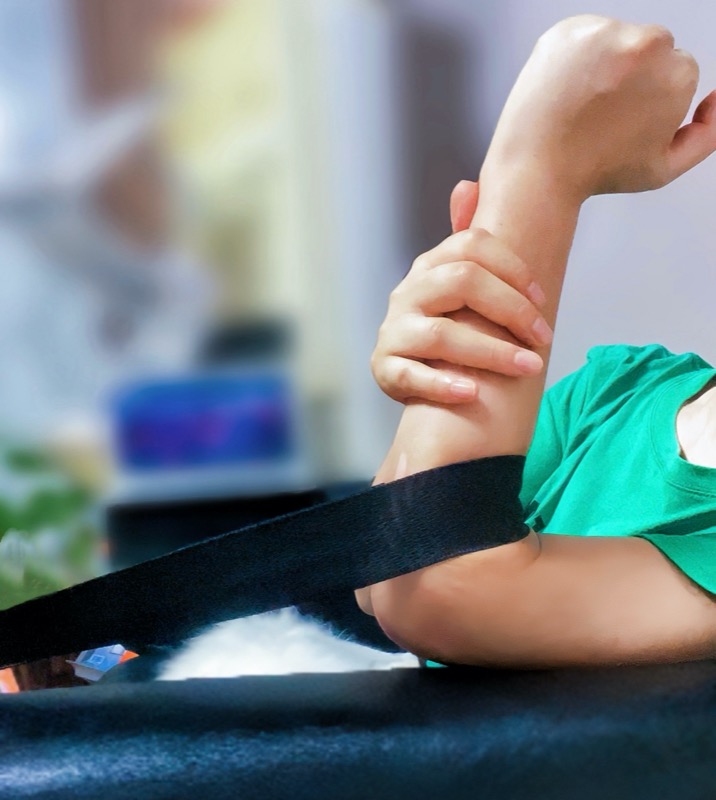
Before each training session, I did an "activation" step. Sitting on the couch, I rested my upper arm flat on the armrest and let my fractured arm bend inward toward my shoulder as far as it could go. Then I placed a light resistance band (5–10cm wide, much lighter than a glute band) around my elbow joint, pulling at roughly 45° outward and downward, with the other end held under my foot on the same side.
The key: neither my arm nor my foot actively pushed. My arm just hung in its maximum bent position for 10 minutes.
The purpose was muscle activation. The band created gentle resistance against the elbow muscles, and my bending angle would naturally increase slightly during this process.
My experience: typically after the previous day's training, say my flexion was 100°, it would stiffen overnight and drop back to about 95° the next morning. After 10 minutes of band activation, the angle would come back to 100°, and then I'd start my actual rehab exercises.
2. Active-Assisted Flexion/Extension
Use your healthy hand to gently help your injured arm bend and straighten. The key is that your injured arm should also be actively engaging — not just being pushed by the other hand. This is the most fundamental recovery exercise, and most physical therapists will start with this one.
3. Resistance Band Flexion
Step on one end of a resistance band with the foot on the same side as your fractured arm, hold the other end, and slowly perform a bending motion. The band provides assistance in the initial phase, letting your biceps work under reduced load. As strength returns, gradually decrease assistance or switch to a band with more resistance.
4. Light Dumbbell Curls
When your PT determines the timing is right, you can begin light dumbbell curls (starting at 0.5–1kg). The focus isn't the weight — it's achieving full range of motion. Each curl should push toward your maximum bend within your current ability.
5. Forearm Rotation (Pronation/Supination)
Hold a light object (like a hammer or a water bottle with a small amount of water) and rotate your forearm — alternating between palm up and palm down. This restores forearm rotation, which many people overlook but is essential for daily activities like turning a doorknob, opening a bottle cap, or catching objects.
6. Post-training: Ice pack (very important)
After every training session — especially in warm weather — apply an ice pack to the fracture area for 10–15 minutes. Icing helps reduce inflammation and discomfort after exercise, and is a commonly recommended part of post-rehab care.
My rehab doctor was explicit about this: you must ice after every session. This step is easy to skip, but it matters.
Once more: all of the above is for reference only. Your specific training plan must be designed by your physical therapist based on your condition. Training too early or too aggressively can cause re-injury.
Why "Feeling Like You're Not Progressing" Might Be Wrong
This was the most painful — and most important — realization of my entire recovery.
For several weeks, I trained every day and felt like my range of motion was exactly the same as the day before. I started doubting everything: was I doing the wrong exercises? Had my joint hit its limit?
It wasn't until I started measuring and recording my angle every day that I discovered: I had been improving the whole time — I just couldn't see it.
Some days the angle went up by just 1 degree. Some days it actually looked like it went backward (probably due to muscle fatigue or swelling from the previous session). But when I connected a full month of data points, the trend was clear: steady improvement.
This is why data tracking matters so much. Your feelings will deceive you, but the data won't.
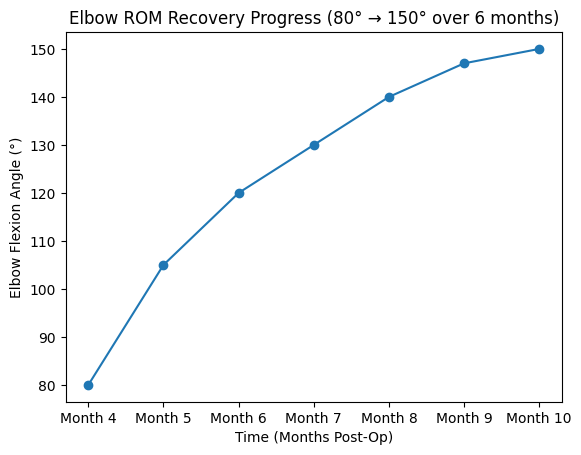
My actual recovery data:
- Month 4 post-surgery: 80° — Starting point. I had been using a CPM (continuous passive motion) machine for 2 weeks with virtually no improvement. After switching to active resistance band training, I broke through from 80° to 90° within one week. At this point I could finally hold a toothbrush in my right hand to brush my teeth — though it was still a struggle.
- Month 5: 105° — Gained 25°, averaging about 5° per week, or less than 1° per day. This was my fastest month. Without measuring, I wouldn't have noticed the daily changes at all.
- Month 6: 120° — Gained 15°, averaging about 4° per week.
- Month 7: 130° — Gained 10°, averaging about 3° per week.
- Month 8: 140° — Gained 10°, averaging about 2.5° per week.
- Month 9: 147° — Gained 7°, averaging about 2° per week.
- Month 10: 150° — Gained 3°. The closer you get to full range, the slower the progress, the harder each degree becomes, and the more force your training requires.
Total: from 80° to 150° over 6 months of consistent training.
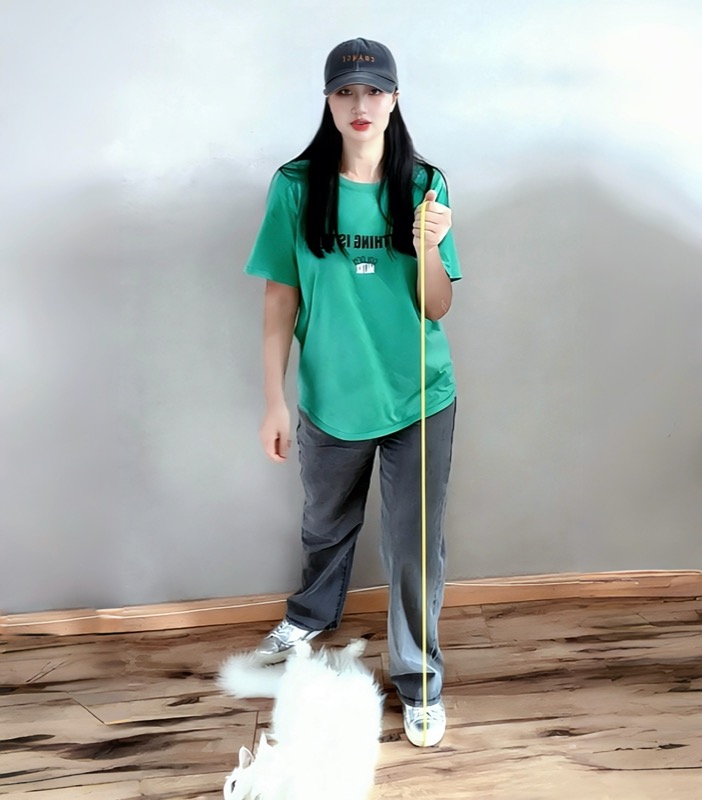
From 80° to 150°: Visual Recovery
Visually, the difference was dramatic:
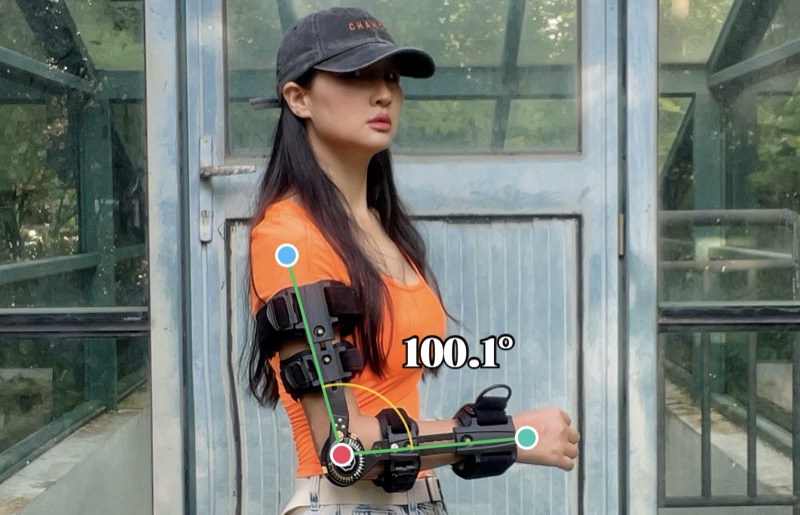

Why You Should Measure Your Angle After Every Training Session
Rehab training and angle measurement form a closed loop:
Training improves your range of motion → Measurement tells you how much it improved → Seeing progress gives you motivation to keep training.
If you remove the "measurement" step, you're left guessing based on how it feels. And feelings — especially during a long, grueling recovery — are the least reliable source of information.
This is exactly why I built AI Goniometer. I needed a tool that would let me — alone at home, right after training — measure my angle in a few seconds and have it automatically recorded. A traditional goniometer couldn't do this (you can't operate it solo), and eyeballing couldn't do it either (not accurate enough, no tracking).
If you want a detailed comparison of measurement methods, I wrote a separate breakdown → How to Measure Elbow Range of Motion at Home (3 Methods Compared)
Measure your elbow angle in 5 seconds with your phone camera after every training session — no app, no help needed.
Try it free →Frequently Asked Questions
Related Articles
- Want to know how your current angle compares to normal values? → What Is Normal Elbow ROM After Fracture? (Clinical Standards + Daily Life Guide)
- Want to learn the best ways to measure your elbow angle at home? → How to Measure Elbow Range of Motion at Home (3 Methods Compared)
Final Thoughts
Recovery after a fracture is a long road, and nobody can walk it for you. But I can tell you this: when you feel the most hopeless, progress may already be happening — you just can't see it.
Measuring your angle isn't just a number. It's evidence you give yourself: today I improved by 1 degree. That 1 degree — even 0.1 degree — becomes the reason you keep training tomorrow.
Measure your elbow angle in 5 seconds with your phone camera after every training session — no app, no help needed.
Try it free →